FFXIV’s gpose system is largely intuitive, but there are certain frequent issues that ENTM participants have run into frequently enough that they deserve to be addressed in a more central location.
Why do other people complain that my screenshots are too dark?
Screenshots are not always “what you see is what you get” because the monitors that each of us play on are all very different. Some people are playing on a brand new television that is very bright in a well lit room. Others are playing on an older laptop in a dimly lit coffee shop. Because of this, you need to try to standardize the experience of your screenshots and the game across EVERYONE’S monitors to ensure that they look mostly the same no matter what screen you are on.
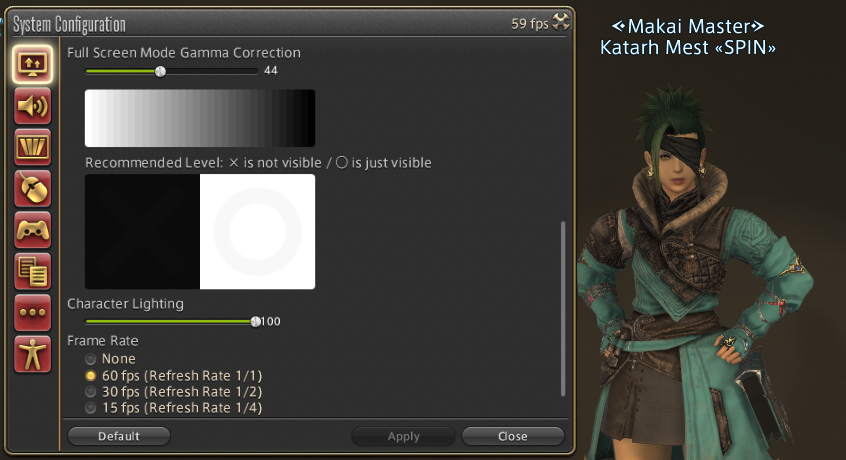
Gamma Correction
Go to System Configuration > Display Settings. Scroll down to the bottom of the screen. Look for Full Screen Mode Gamma Correction.
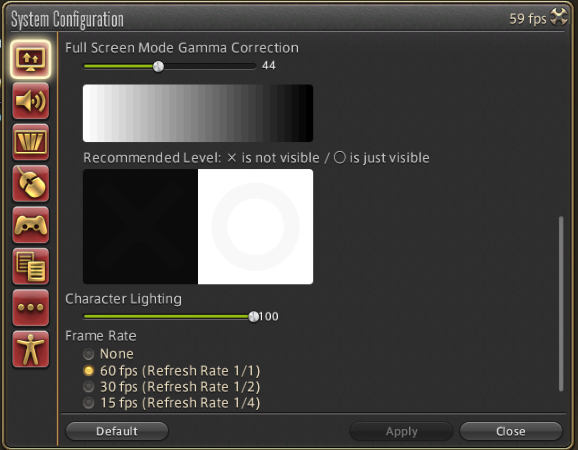
Per the instructions in the game, the “X” in the black square should not be visible. However, the “O” in the white square should be barely visible. If you can see the X, your gamma correction is too bright compared to what the game is intended to be played at.
Drag the gamma correction slider to the left until the X disappears. On my monitor, this required a correction of -6 compared to the default level of 50.
If your monitor is still displaying the X even at brightness 0, you will need to adjust the monitor or television brightness as well. Check with your manufacturer’s documentation to learn how to perform brightness and color correction on your device.
Character Lighting
For character centric screenshots, having this at maximum is not necessarily a bad idea. This helps your character pop out from the background even in very dark scenes. If you prefer manual control on your character, you can drop this to 50 or even 0, but the difference can be pretty stark in darker conditions!
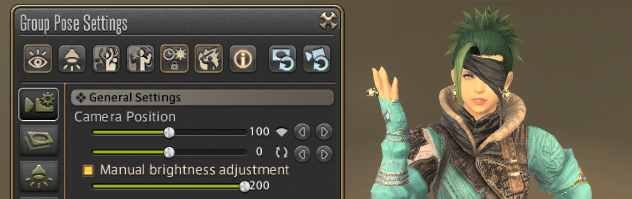
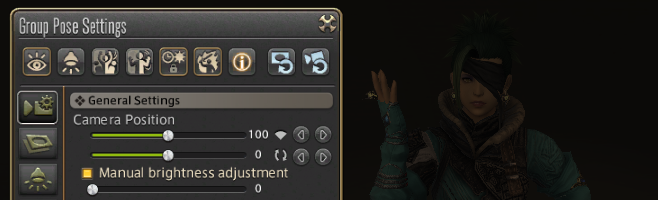
Gpose Manual Brightness Adjustment
Within Gpose itself, you can also adjust the brightness of a given screenshot. Be careful though, because this can lead to a washed out effect when used in moderate light conditions.
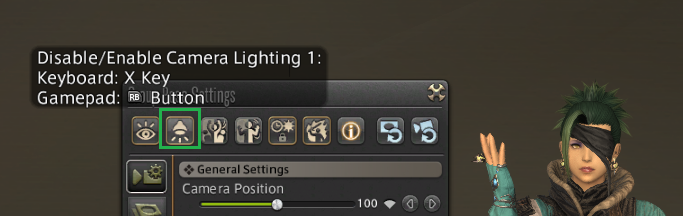
Gpose Spotlights
There is a one button instant camera light that will put a big spotlight on your character.
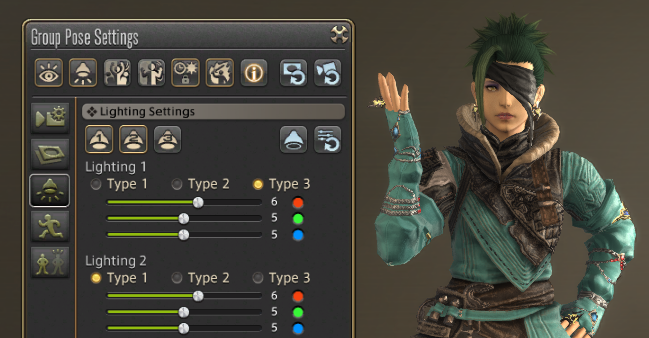
You can also manually add lights by rotating the camera and clicking on the 1, 2, and 3 spotlight buttons. Lighting Type 3 is the brightest and puts a large cone over the whole area, whereas Type 1 is a soft spotlight only on your character. This can be used to add a manual direct light and indirect light effect from one side, to match the environment.
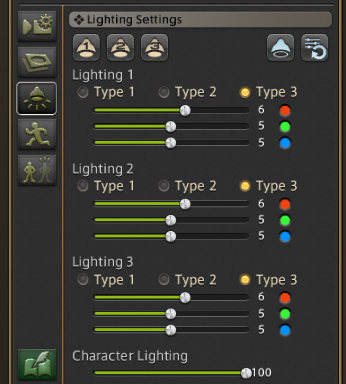
Play with the various light settings until you find something that lets the character pop out from the background without looking unnatural. This can also be used to add intriguing light and shadows to your face, hair, and outfit.
Colored Spotlights
You can also manually adjust the colors of the spotlights to enhance the mood of your shot. Warmer colors help your character come forward on the screen, while cooler colors may help them blend into an environment better. Play with the colored settings until you find something that looks good. There is no one right way to gpose, after all!

How come my screenshots don’t have an FFXIV watermark?
ENTM requires that all contest screenshots have the FFXIV watermark on them. This is the stamp applied by the game itself using the screenshot action. Third party screenshots will override the game’s application of the watermark. Per the media license rules, in order for us to host the in game screenshots on our server, they must have some kind of watermark. On Instagram, Tumblr, and Twitter, this may be a custom watermark (so long as it has the copyright notice to SE) but in the interest of fairness and to ensure no third party apps are used, ENTM requires the base game watermark.
The following third party programs will override the watermark function using screenshots:
- Reshade and Gshade
- Steam
- Fraps
- Windows screenshot + paste into third party program
- Windows Snip tool
- Screen captures from Adobe products and other image manipulation products
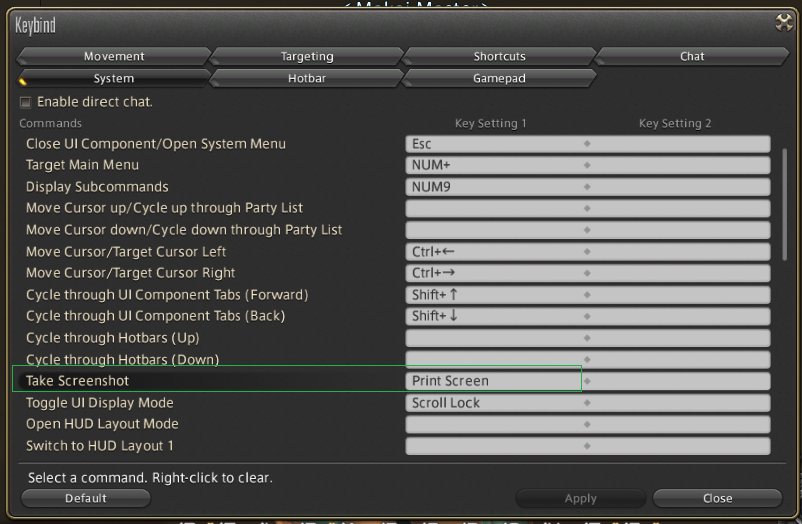
Ensure the FFXIV Screenshot keybind is unique
The most common problem is that the third party program shared the Print Screen keybind with FFXIV. You can set the in game keybind to use a different keyset, such as CTRL+Print Screen, to ensure that the third party program isn’t triggered at the same time as the game print screen.
Know where your screenshots are going
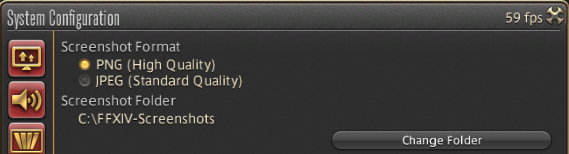
Confirm that you’re looking in the right place for screenshots. The default screenshot folder is usually in My Games. If you want to have a different location, you can manually change this to a different folder in System Configuration. I drop mine right into a special folder on the C drive so I always know where to find them. (And then I sort them by month and year manually, but that’s just me being hyper organized.)
Go ahead and ensure you’re taking PNGs while you are at it, since those are better quality.
For Steam Users, When All Else Fails
Steam users may need to manually launch the game from the Steam folder to bypass the Steam screenshot system. Find where your FFXIV game is installed on the computer, and right click to Run the program. This should launch XIV outside of the Steam ecosystem, and allow you to take your screenshots without interference.
This Reddit thread explains the process. There are also third party “Bypass Steam” launchers if this method does not work.
How do I get my screenshots off my PS4 or PS5?
PSN Share is notorious for only releasing poor quality “lossy” images and not your beautiful full HD resolution images. There are a few ways to get the screenshots off your system in maximum quality.
Use a USB Drive
Insert a USB drive into your PS4/PS5, and copy the max quality screenshots over. Then you can put them on a PC and upload them or share them without an issue.
Direct from the Playstation Website:
- Connect a USB storage device to the PS4 system.
- Go to Settings > Application Saved Data Management > Saved Data in System Storage > Copy to USB Storage Device.
- Select a game.
- Place ticks next to the data you wish to copy, or Select All, and select Copy.
“Do you want to overwrite this saved data” will display if the file you’re copying already exists on the USB storage device.
The date and time shown for each version will help you determine which is the most recent save. Select Yes to replace the version in USB storage. Select No to cancel the copy.
Set up a dummy X(Twitter) Account
This method is more involved, but is an alternate to PSN share if you don’t have access to a PC or a USB drive.
I am going to defer to Kotaku for this, because they have an excellent write up of the process and already wrote up the tutorial for us.
https://kotaku.com/how-to-share-ps4-screenshots-without-spamming-your-fri-1475069299
Use the PSN App on your Phone (PS5 only)
In 2024, PSN added the ability to pull screenshots from your PS5 directly to your phone using the PSN App. This method is similar to the Xitter version, but means you don’t have to have a separate X account.
Make sure your PS5 screenshot settings will capture your images in the highest quality your television or monitor on the PS5 can handle.
https://www.playstation.com/en-us/support/games/ps5-game-captures-ps-app